 https://mylocalhandyman.au/wp-content/uploads/2024/09/renovating-on-a-budget-how-a-brisbane-handyman-can-help.webp
1000
1500
troyoverend
https://mylocalhandyman.au/wp-content/uploads/2023/06/my-local-handyman-1-300x300.png
troyoverend2024-11-28 06:30:482024-10-20 23:00:29Renovating on a Budget: How a Brisbane Handyman Can Help
https://mylocalhandyman.au/wp-content/uploads/2024/09/renovating-on-a-budget-how-a-brisbane-handyman-can-help.webp
1000
1500
troyoverend
https://mylocalhandyman.au/wp-content/uploads/2023/06/my-local-handyman-1-300x300.png
troyoverend2024-11-28 06:30:482024-10-20 23:00:29Renovating on a Budget: How a Brisbane Handyman Can Help https://mylocalhandyman.au/wp-content/uploads/2024/09/simple-brisbane-home-improvements-that-increase-property-value.png
1000
1500
troyoverend
https://mylocalhandyman.au/wp-content/uploads/2023/06/my-local-handyman-1-300x300.png
troyoverend2024-11-03 06:29:022024-10-20 23:07:25Simple Brisbane Home Improvements That Increase Property Value
https://mylocalhandyman.au/wp-content/uploads/2024/09/simple-brisbane-home-improvements-that-increase-property-value.png
1000
1500
troyoverend
https://mylocalhandyman.au/wp-content/uploads/2023/06/my-local-handyman-1-300x300.png
troyoverend2024-11-03 06:29:022024-10-20 23:07:25Simple Brisbane Home Improvements That Increase Property Value https://mylocalhandyman.au/wp-content/uploads/2023/11/step-by-step-guide-to-fixing-a-leaky-tap.webp
1500
2250
jarrad
https://mylocalhandyman.au/wp-content/uploads/2023/06/my-local-handyman-1-300x300.png
jarrad2023-12-15 09:18:502024-04-10 00:14:40Step-By-Step Guide to Fixing a Leaky Tap
https://mylocalhandyman.au/wp-content/uploads/2023/11/step-by-step-guide-to-fixing-a-leaky-tap.webp
1500
2250
jarrad
https://mylocalhandyman.au/wp-content/uploads/2023/06/my-local-handyman-1-300x300.png
jarrad2023-12-15 09:18:502024-04-10 00:14:40Step-By-Step Guide to Fixing a Leaky Tap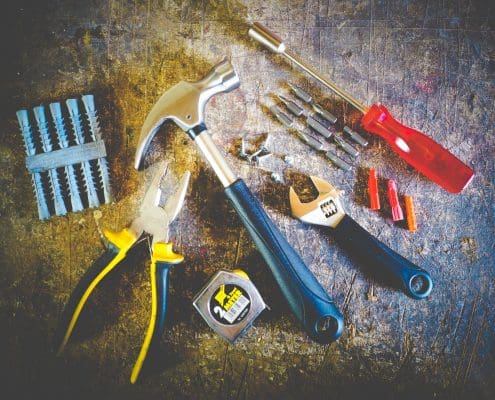 https://mylocalhandyman.au/wp-content/uploads/2023/11/top-10-tools-every-handyman-should-own.jpeg
1500
2000
jarrad
https://mylocalhandyman.au/wp-content/uploads/2023/06/my-local-handyman-1-300x300.png
jarrad2023-12-07 09:18:432024-04-10 00:09:25Top 10 Tools Every Handyman Should Own
https://mylocalhandyman.au/wp-content/uploads/2023/11/top-10-tools-every-handyman-should-own.jpeg
1500
2000
jarrad
https://mylocalhandyman.au/wp-content/uploads/2023/06/my-local-handyman-1-300x300.png
jarrad2023-12-07 09:18:432024-04-10 00:09:25Top 10 Tools Every Handyman Should Own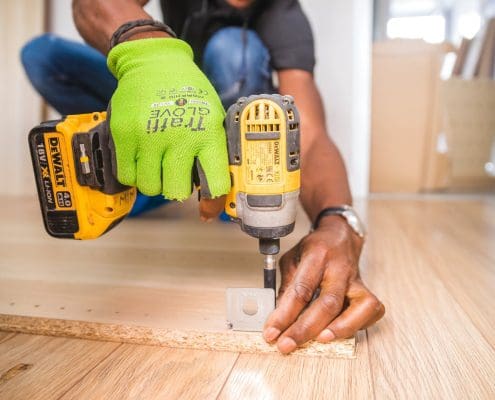 https://mylocalhandyman.au/wp-content/uploads/2023/11/tips-for-safely-using-power-tools-in-diy-projects.jpeg
1500
2250
jarrad
https://mylocalhandyman.au/wp-content/uploads/2023/06/my-local-handyman-1-300x300.png
jarrad2023-12-02 09:15:262024-04-10 00:08:03Tips for Safely Using Power Tools in DIY Projects
https://mylocalhandyman.au/wp-content/uploads/2023/11/tips-for-safely-using-power-tools-in-diy-projects.jpeg
1500
2250
jarrad
https://mylocalhandyman.au/wp-content/uploads/2023/06/my-local-handyman-1-300x300.png
jarrad2023-12-02 09:15:262024-04-10 00:08:03Tips for Safely Using Power Tools in DIY Projects https://mylocalhandyman.au/wp-content/uploads/2023/11/easy-home-repairs-you-can-do-in-a-weekend.webp
1500
2247
jarrad
https://mylocalhandyman.au/wp-content/uploads/2023/06/my-local-handyman-1-300x300.png
jarrad2023-11-29 09:15:262024-04-10 00:06:02Easy Home Repairs You Can Do in a Weekend
https://mylocalhandyman.au/wp-content/uploads/2023/11/easy-home-repairs-you-can-do-in-a-weekend.webp
1500
2247
jarrad
https://mylocalhandyman.au/wp-content/uploads/2023/06/my-local-handyman-1-300x300.png
jarrad2023-11-29 09:15:262024-04-10 00:06:02Easy Home Repairs You Can Do in a Weekend https://mylocalhandyman.au/wp-content/uploads/2023/11/installing-a-new-light-fixture-what-you-need-to-know.webp
1500
2250
jarrad
https://mylocalhandyman.au/wp-content/uploads/2023/06/my-local-handyman-1-300x300.png
jarrad2023-11-25 09:15:282024-04-10 00:04:39Installing a New Light Fixture: What You Need to Know
https://mylocalhandyman.au/wp-content/uploads/2023/11/installing-a-new-light-fixture-what-you-need-to-know.webp
1500
2250
jarrad
https://mylocalhandyman.au/wp-content/uploads/2023/06/my-local-handyman-1-300x300.png
jarrad2023-11-25 09:15:282024-04-10 00:04:39Installing a New Light Fixture: What You Need to Know https://mylocalhandyman.au/wp-content/uploads/2023/11/how-to-properly-paint-a-room-tips-from-a-handyman.webp
1500
2250
jarrad
https://mylocalhandyman.au/wp-content/uploads/2023/06/my-local-handyman-1-300x300.png
jarrad2023-11-22 09:15:292024-04-10 00:03:23How to Properly Paint a Room: Tips from a Handyman
https://mylocalhandyman.au/wp-content/uploads/2023/11/how-to-properly-paint-a-room-tips-from-a-handyman.webp
1500
2250
jarrad
https://mylocalhandyman.au/wp-content/uploads/2023/06/my-local-handyman-1-300x300.png
jarrad2023-11-22 09:15:292024-04-10 00:03:23How to Properly Paint a Room: Tips from a Handyman https://mylocalhandyman.au/wp-content/uploads/2023/11/importance-of-regular-home-maintenance-checks.webp
1500
2250
jarrad
https://mylocalhandyman.au/wp-content/uploads/2023/06/my-local-handyman-1-300x300.png
jarrad2023-11-18 09:15:302024-04-10 00:01:36Importance of Regular Home Maintenance Checks
https://mylocalhandyman.au/wp-content/uploads/2023/11/importance-of-regular-home-maintenance-checks.webp
1500
2250
jarrad
https://mylocalhandyman.au/wp-content/uploads/2023/06/my-local-handyman-1-300x300.png
jarrad2023-11-18 09:15:302024-04-10 00:01:36Importance of Regular Home Maintenance Checks https://mylocalhandyman.au/wp-content/uploads/2023/11/what-to-look-for-when-hiring-a-professional-handyman.webp
1500
2247
jarrad
https://mylocalhandyman.au/wp-content/uploads/2023/06/my-local-handyman-1-300x300.png
jarrad2023-11-14 09:15:322024-04-10 00:49:15What to Look for When Hiring a Professional Handyman
https://mylocalhandyman.au/wp-content/uploads/2023/11/what-to-look-for-when-hiring-a-professional-handyman.webp
1500
2247
jarrad
https://mylocalhandyman.au/wp-content/uploads/2023/06/my-local-handyman-1-300x300.png
jarrad2023-11-14 09:15:322024-04-10 00:49:15What to Look for When Hiring a Professional Handyman